
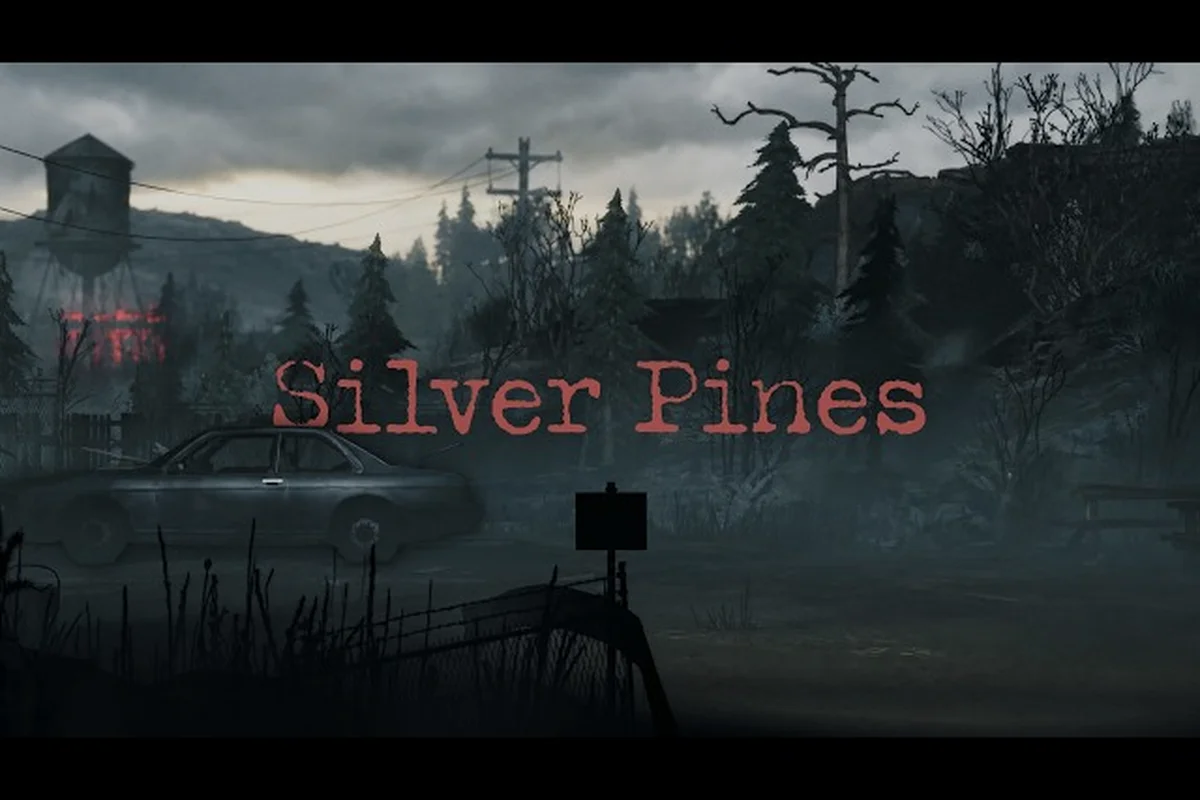
The opening stretch of Silver Pines throws you into a fog-draped mountain town with almost no hand-holding, which is why a focused silver pines walkthrough chapter 1 route saves you from wandering through locked corridors for twenty minutes. This first chapter establishes the arrival sequence, teaches you how the Key Ring inventory works, and introduces the early combat rhythm that carries into the rest of the main story. If you want to reach the North Gate without missing the two hidden supply caches, this guide maps every step.
Arrival Route and the First Locked Doors
Your chapter begins on the Old Timber Road, a narrow path that runs east toward the town boundary. The game does not pause to explain your objective, so the first meaningful decision is which side trail to check before crossing the Covered Bridge. Community walkthroughs consistently note that the left fork contains a Rusty Lantern and two Bandage Rolls, while the right fork only loops back to the main road after a short climb. Because early healing items are scarce, taking the left fork first is the safer opening move.
The first locked door appears roughly four minutes into the chapter, attached to the Storage Shed behind the abandoned gas station. You cannot open it yet because the Brass Key is not available until after the Sheriff's Office scene. This is where many players waste time trying to break the lock with melee attacks, which the game silently ignores. Instead, follow the dirt path past the shed and look for a Wooden Crate near the fence; smashing it reveals a Pocket Map that marks the next objective.
| Location | Item Found | Locked? | Notes |
|---|---|---|---|
| Left fork off Old Timber Road | Rusty Lantern, 2 Bandage Rolls | No | Check before crossing bridge |
| Storage Shed behind gas station | Brass Key (later) | Yes | Locked until Sheriff scene |
| Wooden Crate near fence | Pocket Map | No | Marks next objective |
| Covered Bridge east side | 1 Antiseptic Wipe | No | Hidden under plank |
Once you cross the Covered Bridge, the game triggers a short radio transmission that confirms your arrival in the town proper. The audio cue matters because it also spawns the first Stray Hound encounter on the far bank. Players who sprint across the bridge without clearing the left fork often arrive with low health and no bandages, which makes that first fight unnecessarily tense.
Early Combat Rhythm and Enemy Patterns
Combat in chapter 1 is deliberately slow, but the Stray Hound and Twig Crawler enemies punish button-mashing. Each enemy has a clear Telegraph Window before its attack lands, and the tutorial pop-up explains that dodging during this window grants a brief Stagger state. The key is to wait for the enemy's lunge animation rather than swinging first, because early weapons have long recovery frames that leave you open to a counter-bite.
The Fire Poker you pick up from the gas station office is the only melee weapon available until the Sheriff's Office armory opens. It deals modest damage but has a surprisingly wide arc, which makes it effective against the Twig Crawlers that attack in pairs. According to community testing, the Fire Poker can stagger a Stray Hound in two clean hits if you connect during the lunge recovery, which shortens the fight by several seconds and preserves healing items.
| Enemy | First Appearance | Attack Pattern | Stagger Window | Recommended Response |
|---|---|---|---|---|
| Stray Hound | Far bank of Covered Bridge | Lunge bite, then retreat | After lunge misses | Dodge, then 2-hit combo |
| Twig Crawler | Gas station rear lot | Slow swipe, occasionally pairs | During swipe wind-up | Sidestep, then heavy swing |
| Moss Wretch | Near North Gate | Spore burst at close range | After burst dissipates | Back away, then re-engage |
The Moss Wretch near the North Gate is the chapter's first real difficulty spike, mostly because its spore burst covers a wide area and inflicts a lingering Cough debuff. The debuff reduces your stamina regeneration for about eight seconds, which makes consecutive dodges harder. Players who rush this fight without clearing the two Twig Crawlers first often get surrounded, so the safest approach is to pull the crawlers back toward the gas station and fight them one at a time.
Sheriff's Office Scene and the Brass Key
The Sheriff's Office sits at the center of town and serves as the chapter's narrative anchor. When you enter, a cutscene introduces the Sheriff, who hands you the Brass Key after a short dialogue exchange about the missing townsfolk. This is the moment the Storage Shed door becomes accessible, but the game does not force you to backtrack immediately. You can either return to the shed now or push toward the North Gate and come back later.
Returning to the shed is worth the detour because the interior contains a First Aid Kit, a Shotgun Shell, and a Journal Page that hints at the chapter 2 objective. The Journal Page is missable if you skip the shed entirely, and it adds context to the silver pines main story guide narrative that later chapters build on. Players who want the full story should grab it before leaving the area.
| Sheriff's Office Event | Unlock | Story Impact |
|---|---|---|
| Dialogue with Sheriff | Brass Key | Opens Storage Shed |
| Examine bulletin board | North Gate route marker | Clarifies chapter 2 direction |
| Read desk note | Safe combination hint | Leads to optional loot |
| Leave office | Stray Hound respawn | Triggers second encounter |
The Safe in the Sheriff's back room is an optional puzzle that rewards a Revolver Cylinder, which you cannot use until chapter 2. The combination is written on a desk note, but the note is easy to miss if you rush the dialogue. Because the Revolver Cylinder carries forward into the next chapter, grabbing it now saves you a return trip later in the silver pines walkthrough chapter 2 route.
North Gate Preparation and Hidden Caches
Before you approach the North Gate, there are two hidden supply caches that most first-time players walk past. The first is behind the Church Fence, tucked between a stack of firewood and the stone wall. It contains a Makeshift Shiv and one Antiseptic Wipe, both useful for the Moss Wretch fight. The second cache sits under the Dock Boardwalk, accessible only by crouching near the water's edge; it holds three Bandage Rolls and a Flare.
The Flare is particularly valuable because it can temporarily blind the Moss Wretch, giving you a safe window to land two or three free hits. Community reports suggest that using the Flare at the start of the fight makes the encounter noticeably easier, especially for players who are still learning the dodge timing. If you skipped the left fork cache at the start of the chapter, the Dock Boardwalk cache is your best chance to restock healing items before the gate.
| Hidden Cache | Location | Contents | Best Use |
|---|---|---|---|
| Church Fence cache | Behind firewood stack | Makeshift Shiv, 1 Antiseptic Wipe | Moss Wretch fight |
| Dock Boardwalk cache | Crouch near water edge | 3 Bandage Rolls, 1 Flare | Emergency healing, blinding |
| Gas station roof cache | Climb dumpster, then ladder | 2 Shotgun Shells | Save for chapter 2 |
| Old Timber Road cache | Left fork, before bridge | Rusty Lantern, 2 Bandage Rolls | Early survival |
The Gas Station Roof cache is easy to overlook because the climb path is not obvious. You need to hop onto the Dumpster behind the building, then use the Ladder to reach the roof. The two Shotgun Shells are useless in chapter 1 since you have no shotgun, but they carry into the next chapter and give you a small head start on ammunition. If you are following the broader silver pines main story guide, grabbing these shells now is a smart efficiency play.
Chapter 1 Boss Encounter and Transition to Chapter 2
The chapter ends with a North Gate Warden fight, a hulking enemy that guards the path out of town. Unlike the smaller enemies, the Warden has a Charge Attack that covers a long distance and a Ground Slam that creates a shockwave. Both attacks are telegraphed, but the Ground Slam has a delayed second hit that catches players who dodge too early. The safe pattern is to dodge the charge, land two hits during the recovery, then back away before the slam.
The Warden also summons two Twig Crawlers at half health, which forces you to manage multiple targets. The Flare from the Dock Boardwalk cache is extremely useful here because it blinds the Warden long enough to eliminate the crawlers without taking chip damage. Players who saved the Flare for this moment will find the fight significantly more manageable than those who used it earlier.
| Warden Attack | Telegraph | Safe Response | Punish Window |
|---|---|---|---|
| Charge Attack | Low growl, then sprint | Dodge sideways | 2 hits after miss |
| Ground Slam | Raises both fists | Back away, wait for second shockwave | 1 heavy hit |
| Crawler Summon | At 50% health | Use Flare, kill crawlers first | 3-4 free hits |
| Roar Stun | At 25% health | Move behind Warden | 2 hits from rear |
Once the Warden falls, a short cutscene shows the North Gate opening and the road beyond. This is the natural stopping point for the silver pines walkthrough chapter 1 route, and the game auto-saves before the transition. The items and story flags you collected here carry directly into the silver pines walkthrough chapter 2 opening, which begins on the Ridge Trail with a new set of locked doors and a tougher enemy roster. For players who want to see how the side paths connect to the main route, the side areas walkthrough covers optional detours that branch off from this chapter's town hub.
Frequently Asked Questions
How long does chapter 1 take to complete?
A focused run through the silver pines walkthrough chapter 1 route takes about 35 to 45 minutes, including the two hidden caches and the Warden fight. Players who skip optional loot can finish in under 30 minutes, but they miss the Revolver Cylinder and Shotgun Shells that help in chapter 2.
Can I return to chapter 1 areas after moving to chapter 2?
No, the North Gate closes behind you after the Warden fight, and the town hub becomes inaccessible until a later story event. This is why grabbing the Journal Page, Revolver Cylinder, and Shotgun Shells before the boss is important for a complete silver pines main story guide run.
What is the best weapon for the chapter 1 boss?
The Fire Poker is your only melee option, but the Flare from the Dock Boardwalk cache is the real equalizer. Blinding the Warden at the start of the fight lets you land free hits and clear the summoned Twig Crawlers without taking damage, which makes the encounter far more forgiving.
Do I need to find every hidden cache to progress?
No, the hidden caches are optional, but they provide healing items and ammunition that carry into the silver pines walkthrough chapter 2 opening. The Dock Boardwalk cache is especially valuable because the Flare trivializes the chapter 1 boss and gives you breathing room in the next chapter's early fights.
Is there a way to skip the Sheriff's Office scene?
You cannot skip the scene, but you can speed through the dialogue by holding the interact button. The Brass Key is mandatory for opening the Storage Shed, and the Safe combination note only appears if you examine the desk before leaving, so rushing the dialogue means missing the Revolver Cylinder.